-
Your shopping cart is empty!
MENU
- +
-
All products
+
- Blog +
- Deliveries +
- Payments +
- Contact us +
- SPECIAL OFFERS +
Your shopping cart is empty!
“RED TO RED”, “ORIENTATE THE MAP”, “thumb your map” are some terms that occur repeatedly for beginners and elite orienteers alike. Applying these principles is vital for interpreting the map. Constant repetition will reinforce these basic techniques of orienteering.
THE MAP is a simplified image of reality (see page 6-7). If the map is orientated incorrectly, the reality does not match the map. We cannot change reality but we can reposition the map to reality or, as we say ”orientate the map”.
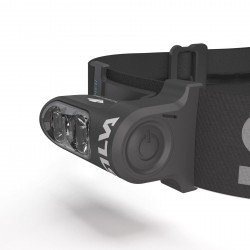
YOU CAN EITHER orientate the map to the terrain, for example using by houses and roads or by using the simple ”red to red” principle with the help of a compass. In cooperation with Silva and the project ”Skol-Sprinten”, we have developed a new compass ”Begin” which is perfectly adapted to children’s hands and sits smoothly on the wrist.
1 fold your map
Fold the map to a comfortable size for your hand.

2 Thump your map
Place your thumb where you are right now.
3 red to red
Rotate the map until the red edge of the map and compass red north arrow form a ”T”, i.e. north arrow is pointing toward the edge of the map. You are now orientated to reality.

Chessboard, red to red BUILD A CHESSBOARD (64 squares) using plastic bands or string and sticks on a lawn, or with chalked lines on the school yard asphalt surface or thin and narrow boards (free from the building trade). One edge is marked with red plastic, red chalk or coloured red board (preferably to the north).
The map below shows 6 different symbols that can be marked as follows: Trees (spruce twig), play equipment (toy), boulder (clenched fist big stone), height (upside down Chinese hat), building (shoebox), and pole (stick).

THE STUDENTS WILL each receive a map of the chessboard and they help the teacher to build ”the terrain” with equipment as above. In this folder, there are four different examples of course (see next page). Students begin at the start (triangle) and then follow the dashed line to the finish (double rings).
TO START the students fold their maps to a comfortable size, identify their location on the map with their thumb at the appropriate start (1, 2, 3 or 4). The students then orientate map by rotating map using the compass and the ”red to red” Principle. If no compass, orientate the map to the terrain with the map’s red edge toward the red edge in the terrain.
THE STUDENTS GET to practise orientating the map by following the dashed line. At each change of direction they stop to move their body around the map whilst the map is fixed (red to red).
THE EXERCISE ends when all students have a map without lines. On this map they draw a new course and start running after each other. Switch maps between students.


")


